Saturday August 15 1- 3 CST. ZOOM ROOM 759 634 8840 PW 5wUrde
Zine– some sort of publication, usually mass-produced by photocopying (in some cases, scanned, put on the ‘net, or copied via fax) on any range of topics, but usually filled with passion. a means of telling one’s story, sharing thoughts, and/or artwork, comics or doodles. – Urban Dictionary
What is a zine? Well, to start it is properly written with the apostrophe because it is short for “magazine.” They began as fan ‘zines in the late 50’s and 60’s. Scifi stories, recipes, Elvis and the Beatles all had handmade ‘zines. They were relatively cheap to produce and to mail since many used one sheet of paper efficiently. Early ones were typed out using carbon paper or mimeograph sheets with its distinctive smell and blue color “ink” could make larger quantities. As photo copiers became more accessible and less expensive in the late 60’s – art groups like Fluxus took advantage of the possibility of multiples and created small books with collages, text and drawings.
Zines are still a popular form -personally, I like to create mine on a Vandercook printing press with wood engravings and lead type. But some folks still draw, paint and do beautiful calligraphy. My computer savvy college students created some of the examples in the gallery using Photoshop, InDesign and digital imagery. But my favorite books are sill the ones I do with the grade school students who are learning to write and love to draw and know in their hearts that all books are “magically revealing objects.” The simple format makes it possible for them to write a story, illustrate it and put “J. Smith- author and illustrator ” on the cover.
ONE PAGE WONDERS
I started calling these “one page wonders” because they were easy to layout in a word processing or simple graphics program and printed in bulk on my inkjet printer or my Canon copier. It was a one pass printing, fold on the line and cut procedure and yielded sturdy easy small books. Later I took to adapting a simple case binding and created hard cover zines of family recipes as gifts.
I learned most of these structures from Shereen LaPlantz- she referred to them as origami books- because they use basic origami and accordion folds. When I worked with the Milwaukee Public School students as an artist in residence- the students taught me new terms for origami folds and renamed all my book structures. I thought it might have been because lunch was right after our books and writing session- but my college students seem to use the same lingo- so just remember your “hot dog” and “hamburger” folds to construct theses two easy zines. Just as in origami, accuracy counts and so do crisp folds- use a bone folder. Match corners accurately and cut carefully on the heavy lines. These are accordion-folded back and forth- you may have to reverse fold to achieve the proper pagination.
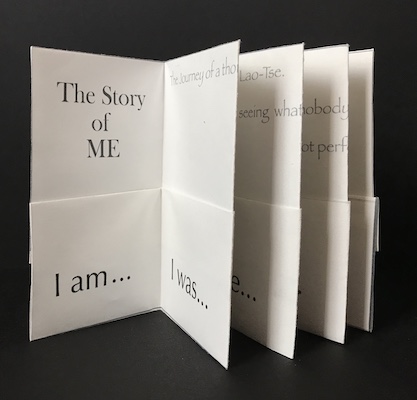
Let’s start simple- these both start with the same fold structure and create an 8 page zine:
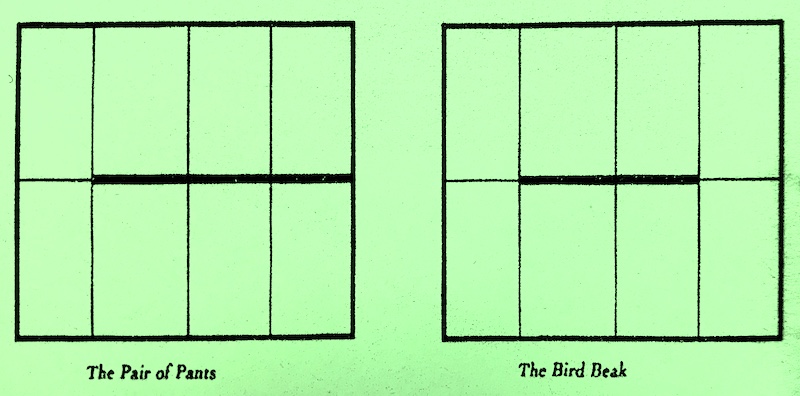
Fold any piece of paper in half the long way (aka hotdog) and open it up. Fold in half the short way (aka hamburger) – then fold the paper edge back to meet the center fold. Flip over and repeat on the other side. Your paper should look like a W or and M (unless you are my smart alec mentor who said his was a 3). Cut on the heavy line. The Bird Beak is easier to cut if you leave it in hamburger form and cut from the fold to the first line. Fold on the long side center line and accordion fold the pages- the Bird beak pages wrap around to create a cover.
Bird Beak- note the position of the cover and back cover 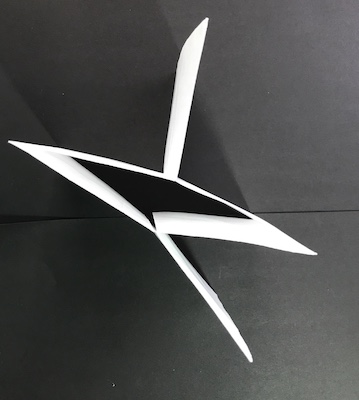
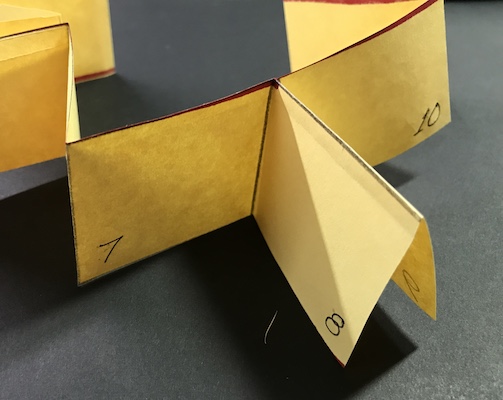
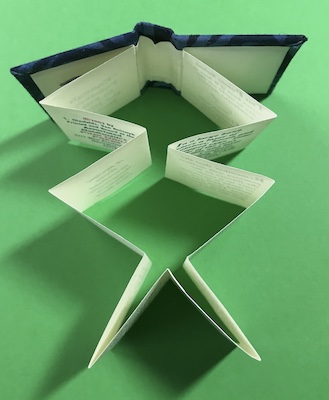
Fold in half, squash the star shape and wrap 
Front cover 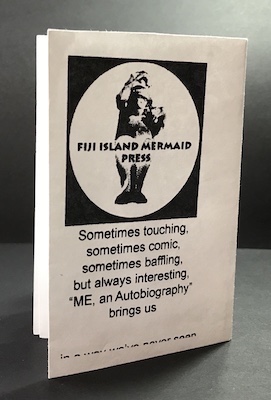
Back cover
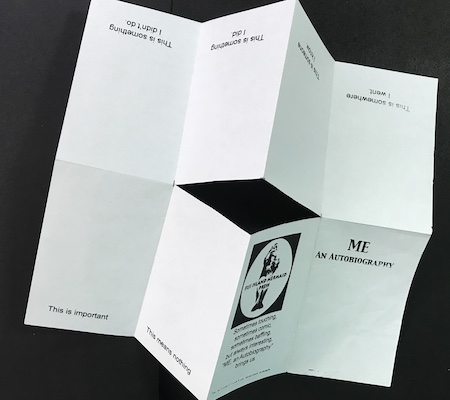
This book by Fiji Island Mermaid Press was part of a public art event in the Fluxus mold- Marc Snyder made the book template available on line. The Minions book group printed and photocopied the books, folded them and left them in odd places all over Milwaukee. The idea was the lucky finder would fill in the book, scan or photograph it and then post the images back to the web site. Marc’s site is still full of wonderfully quirky zines- go to www.fimp.net and check out his pages, blog and flicker gallery. We did some of the Sartre and Freud ones- but I don’t have any left. We did start making our own zines and leaving them in doctor’s waiting rooms, the number 10 bus, bathrooms at Barnes and Noble and in the UWM library stacks- just to see what we would get back.
IMPOSITION and DUMMIES
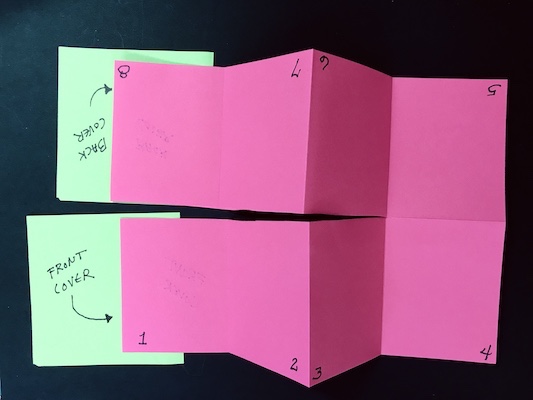
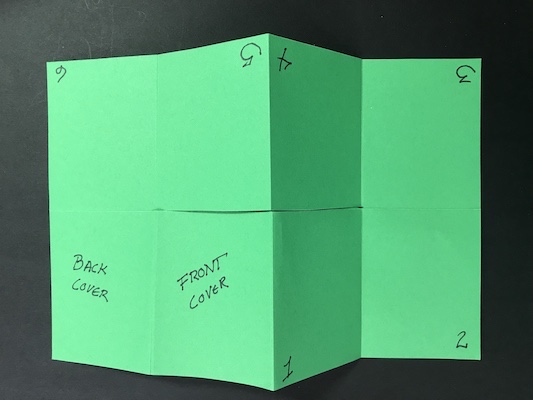
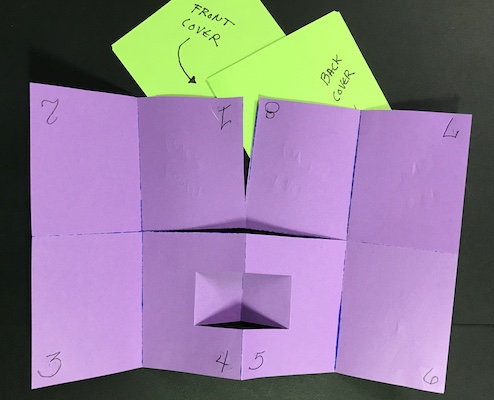
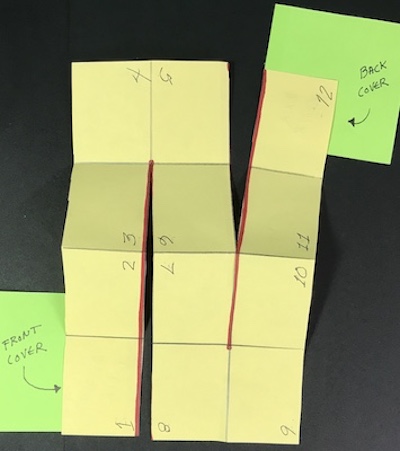
No, I’m not talking about pestering ventriloquist’s props. These are the terms bookbinders use to refer to the layout of a piece of paper and a mock up of a book. I have a handout on imposition layouts for larger books as a reference. (To be posted later) For these two 8 page dummies- here are their imposition layouts- something to consider if you are going to make your books in a word processing or graphics program. I also have to consider this as I lock up my wood blocks and type on the press. Direction matters! Notice that the numbers go from 1- 4 right side up and from 5- 8 upside down. The front and back cover are on the other side of the paper. The book structure that wraps around only gives you 6 pages because the front and back cover are integrated into the layout. Once you make your dummy- you are all set to create your text and images…
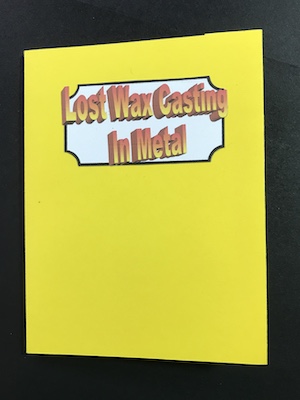
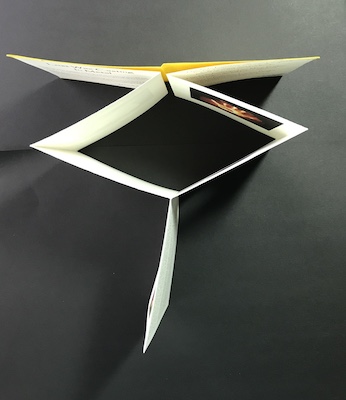
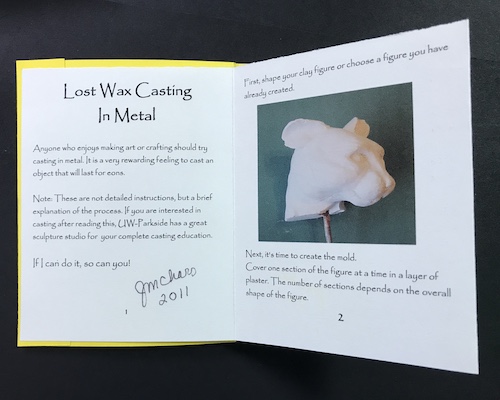
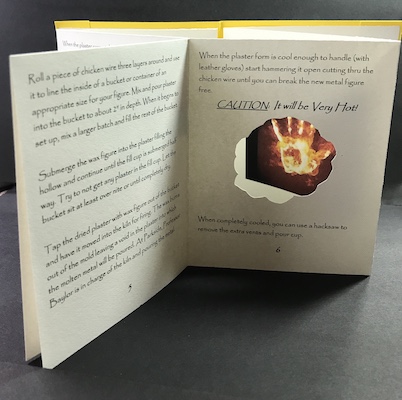
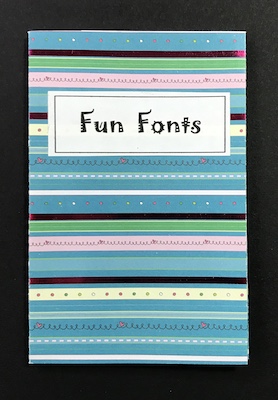

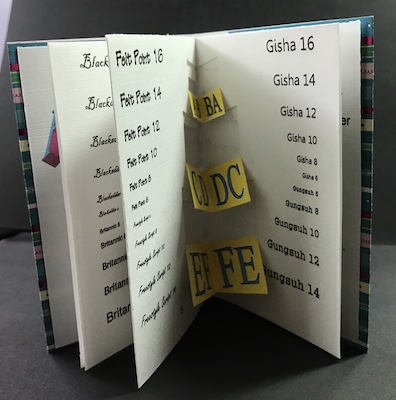
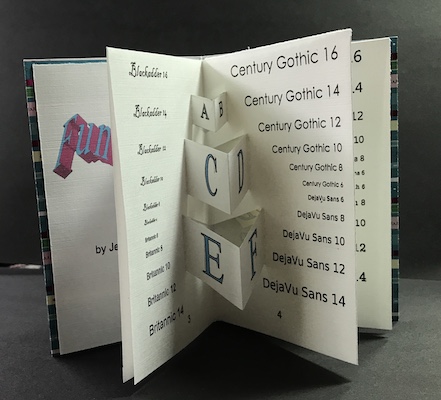
Two books by talented sculptor (and my former UW-Parkside art student) Jean Chars using the Pair of Pants format. She really took advantage of the folds to create a window for the kiln image in her Lost Wax Casting book and to create pop ups for the fonts in her Fun Font book. She glued the 1 and 8 pages to a card stock covers to give them a more traditional book appearance. These are some of her first books!
So both of those books were a single sheet of paper printed on an inkjet printer but even that simple structure gives you so many possibilities. If you want to try something a little more involved or with more pages- try the Boustrophedon- it means as the ox plows. It is a meandering accordion and you can get 12- 16 pages depending on how you fold it. The T fold has a built in cover and a simple pop up. Remember to create your dummy so you know where your text goes and how to align your images.
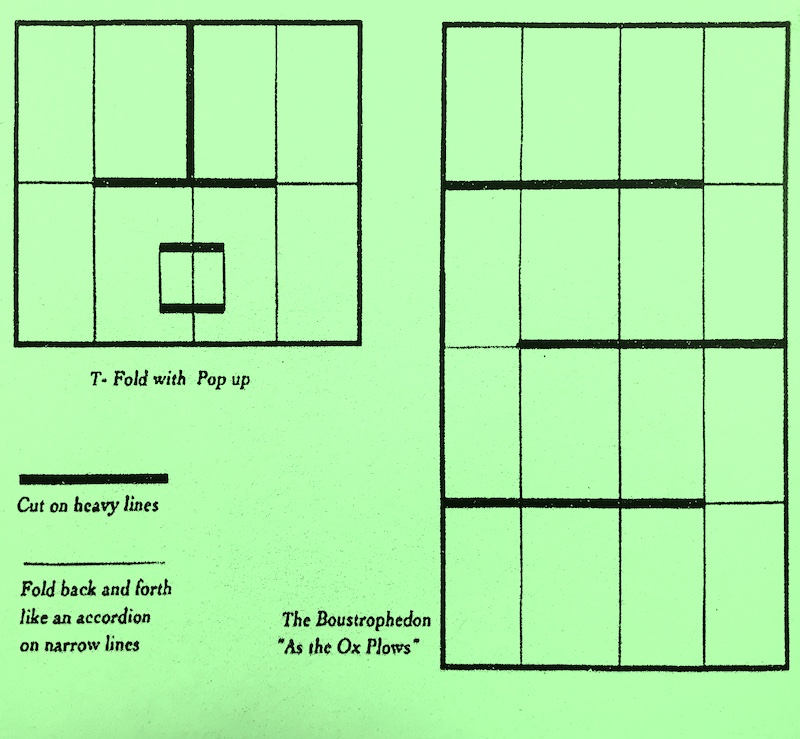
Here are the impostion patterns
Put a little glue here to close up this folded area 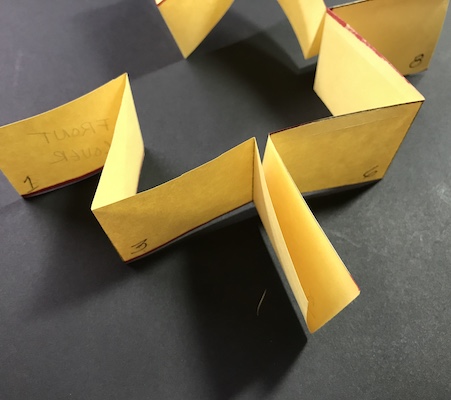
A little glue here to close up this folded area 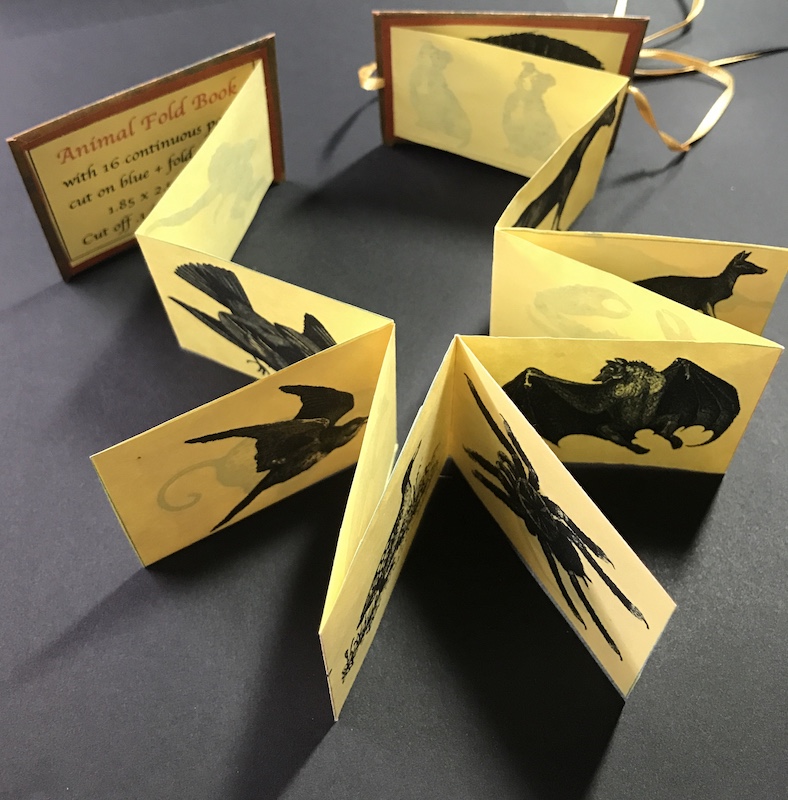
Two pieces of decorative paper covered matte board and a ribbon converts this from a zine to an accordion book that was designed in Microsoft Word using vintage animal engravings
These little books started out on the computer as zine layouts. They were glued into hard covers and covered with book cloth to create “flutter books” because they aren’t sewn into the spine so the front can flutter out.
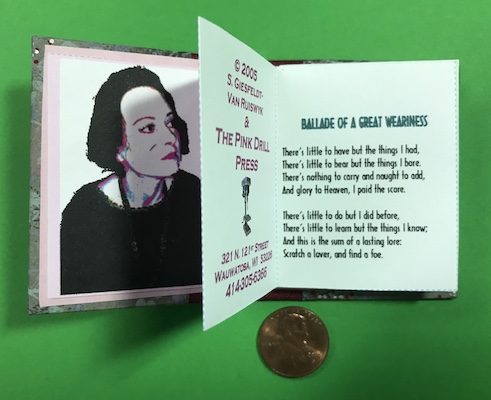
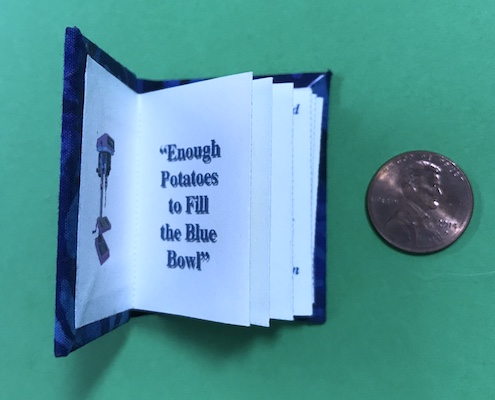
Look for these cover directions under Simple Covers and Cases.